
Let’s talk about one of the coolest desserts on the planet: Chocoflan.
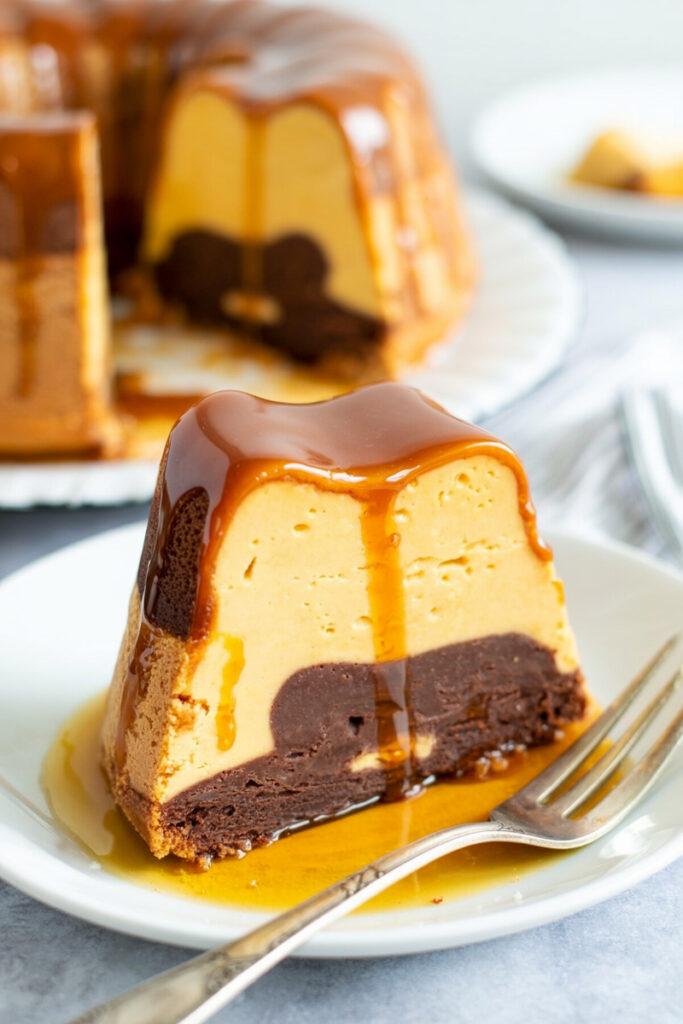
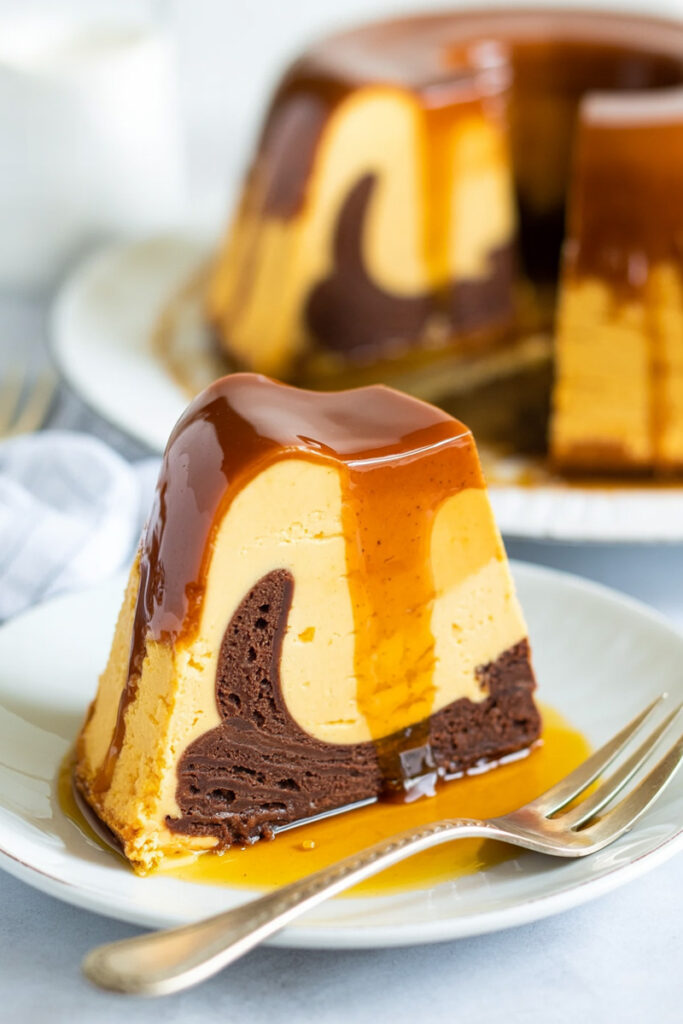
Seriously, if you’ve never tried it, you’re in for a wild ride. Picture this. You have a super moist, chocolate cake spiced with a little cinnamon. On top of that sits a layer of the creamiest, smoothest vanilla flan you’ve ever tasted. And the whole thing is covered in a glorious caramel sauce. It’s a total showstopper.
In Mexico, people often call it Pastel Imposible. The “Impossible Cake.”
Why? Because something truly magical happens in the oven. You pour the batters into the pan in one order, and they completely flip while baking. It’s like a little science experiment that you get to eat. The cake batter sinks, and the flan batter rises. The result? Two perfect, clean layers.
I remember the first time I made one. I was so sure I had messed it up when I poured the thin flan mix on top of the thick cake batter. But I followed the steps, and when I flipped it out of the pan… it worked. The relief and excitement were real! This recipe is designed to give you that same amazing feeling, without the stress. It’s a keeper.
So, grab your apron. Let’s make some magic. I’ll walk you through every single step.
A Quick Look at What’s Ahead
This isn’t a whip-it-up-in-30-minutes kind of dessert. But trust me, every minute you put in pays off big time.
Time: You’ll need about 20 minutes to get everything ready and 1 hour for baking. But don’t forget the cooling time! You need at least an hour for the cake to cool down before the big flip.
Servings: This recipe makes one big bundt cake, enough for about 12 good-sized slices. I wouldn’t recommend cutting the recipe in half. The whole magic of the layers works best in a full-sized pan. Just make the whole thing and be the most popular person at the office or the family gathering.
Difficulty: Let’s call it Intermediate. There are a few moving parts, like a water bath, but don’t let that scare you. The steps are simple, and I’m here to guide you. You’ve got this.
What You’ll Need (Your Tools)
No super-specialized gear is needed, but a few things make this way easier.
- A 12-Cup Bundt Pan: This gives the cake its classic, pretty shape. If you don’t have one, a 10-inch tube pan works too. You could use a 9×13 inch pan, but you’ll lose that tall, dramatic look.
- A Large Roasting Pan: Make sure it’s big enough for your bundt pan to sit inside comfortably. We’ll use this to give the cake a gentle steam bath (also called a bain-marie).
- An Electric Mixer: A stand mixer or a hand mixer will be your best friend for creaming the butter and sugar for the cake.
- A Blender: This is the secret weapon for a perfectly smooth flan. No lumps!
Can I make it ahead? YES! In fact, I think it tastes even better the next day. The flavors get to hang out and get to know each other. You can bake it, let it cool, then cover it and pop it in the fridge for up to 2 days before you flip and serve.
The Ingredients: What Goes Inside
Great ingredients make a great cake. Simple as that. Here’s the breakdown.
| Component | Ingredient | Quantity | My Little Notes |
| For the Pan | Softened Butter | 2 tablespoons | Be generous! Grease every little corner. |
| Cajeta (Caramel) | 1/4 cup | Or use Dulce de Leche if you can’t find it. | |
| Flan Layer | Sweetened Condensed Milk | 14 ounces | This is the sweet, creamy base. |
| Evaporated Milk | 12 ounces | For that extra richness. | |
| Cream Cheese, softened | 4 ounces | My secret for a velvety, slightly tangy flan. | |
| Large Eggs | 3 | Make sure they’re at room temperature. | |
| Vanilla Extract | 4 teaspoons | If you can find Mexican vanilla, grab it! | |
| Cake Layer | Unsalted Butter, softened | 10 tablespoons | The start of any good cake. |
| Granulated Sugar | 1 cup | ||
| Large Egg | 1 | Again, room temperature is best. | |
| All-Purpose Flour | 1 3/4 cups | ||
| Unsweetened Cocoa Powder | 1/2 cup | For that deep chocolate flavor. | |
| Ground Cinnamon | 1 tablespoon | This makes the chocolate taste warm and special. | |
| Baking Powder | 1 teaspoon | To help the cake rise. | |
| Baking Soda | 3/4 teaspoon | Works with the buttermilk for a soft cake. | |
| Buttermilk | 1 1/4 cups | Do not skip this! It makes the cake so tender. |
Let’s talk about these layers for a second. For the flan, that little bit of softened cream cheese is a game-changer. It gives it a slight tang and an unbelievably silky texture. Please make sure it’s soft! Just leave it on the counter for an hour, or zap it in the microwave for 15 seconds. This is how you avoid lumpy flan.
For the chocolate cake, we’re not just making any chocolate cake. The cinnamon adds a warmth that perfectly balances the sweet flan. And the buttermilk? It’s non-negotiable. It reacts with the baking soda and makes the cake incredibly soft and tender. No buttermilk? No problem. Just add one tablespoon of lemon juice or white vinegar to regular milk and let it sit for 5 minutes. Instant buttermilk!
Finally, that caramel layer. We’re using cajeta, a Mexican caramel made from goat’s milk which has this amazing tangy flavor.1 If you can’t find it, don’t worry. A good quality dulce de leche works just as well.
The Step-by-Step Guide to Magic
Okay, ready? Let’s do this.
Step 1: Get Your Station Ready
First, move an oven rack to the middle of your oven and preheat it to 350°F (175°C).
Next, grab your softened butter and get in there and grease your bundt pan. I mean, really grease it. Every nook and cranny. This is the single most important thing you can do to make sure your cake doesn’t stick.
Once it’s buttered, pour the cajeta into the bottom of the pan and spread it around.
Last prep step: get about 2 quarts of water boiling on the stove. We’ll need this for the water bath later.
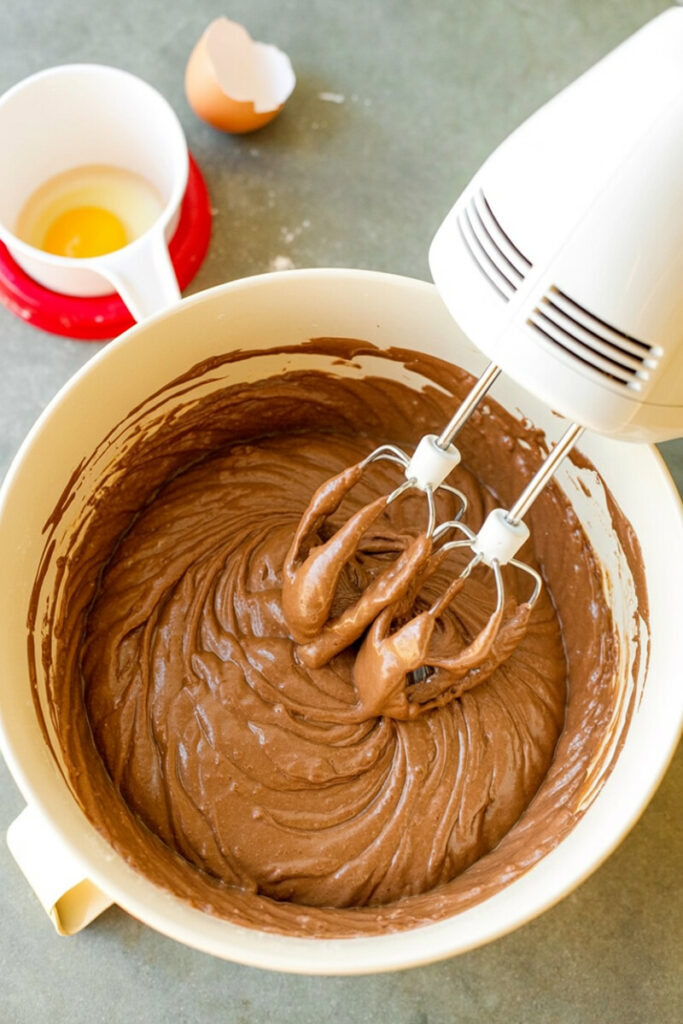
Step 2: Make the Chocolate Cake Batter
In your mixer, beat the 10 tablespoons of butter and 1 cup of sugar together until it looks light and fluffy, about 3-5 minutes. It should actually look paler in color. Scrape down the sides of the bowl, add the egg, and beat it in.
In a separate bowl, whisk together the flour, cocoa, cinnamon, baking powder, and baking soda. Sifting these is a great idea, especially to get rid of any lumps in the cocoa powder.
Now, you’re going to add the dry ingredients to the butter mixture, alternating with the buttermilk. Like this:
- Add about a third of the dry stuff. Mix on low.
- Add half the buttermilk. Mix on low.
- Add another third of the dry stuff. Mix.
- Add the rest of the buttermilk. Mix.
- Add the last of the dry stuff. Mix just until it’s combined.
Pro-Tip: This alternating method keeps you from over-mixing the batter, which is the secret to a tender cake instead of a tough one.
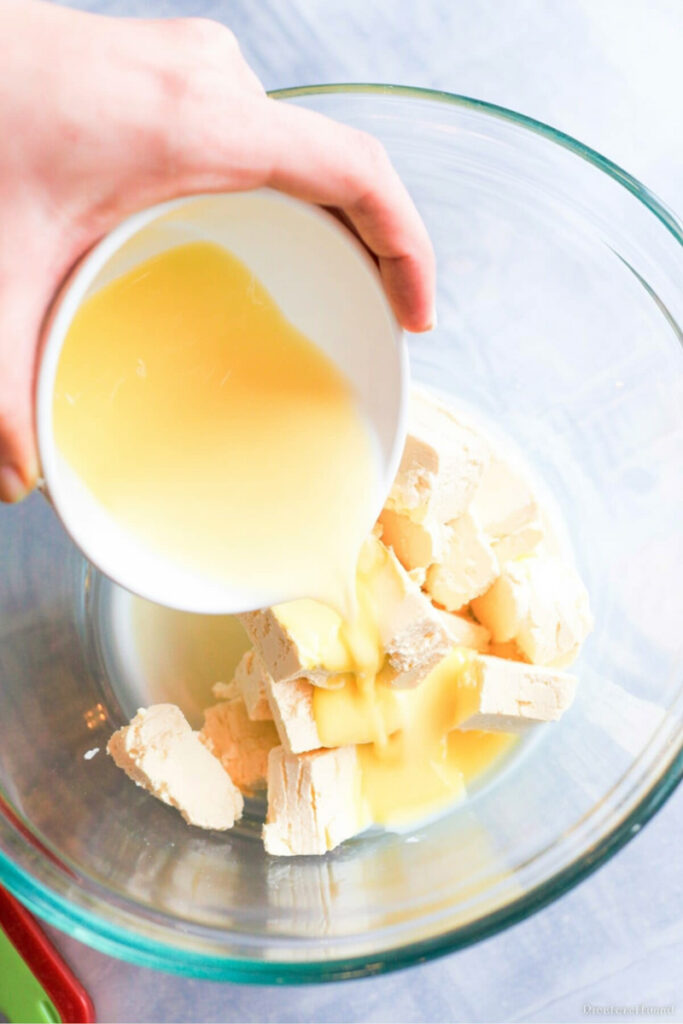
Step 3: Blend the Silky Flan
This is the easiest part. Put all the flan ingredients—sweetened condensed milk, evaporated milk, softened cream cheese, eggs, and vanilla—into a blender. Put the lid on and blend on high for 30 seconds. Done. You should have a smooth, thin liquid.
Step 4: Assemble the “Impossible” Cake
Place your greased-and-carameled bundt pan inside your big roasting pan.
Spoon the chocolate cake batter into the bundt pan, right over the cajeta. It’s going to be thick. Use a spatula to gently spread it into an even layer.
Now for the weird part. Slowly pour the liquid flan mixture over the back of a big spoon onto the cake batter. The spoon helps break the fall of the liquid, so it lays gently on top of the cake batter instead of mixing in.
Lightly butter one side of a piece of aluminum foil and cover the bundt pan tightly, with the buttered side facing the cake. This traps steam and keeps the top from getting a weird skin.
Carefully pour your boiling water into the big roasting pan. You want the water to come about two inches up the side of the bundt pan. Try not to splash any water into your cake!
Step 5: The Bake and the Big Reveal
Gently slide the whole setup into the oven. Bake for 1 hour. Don’t open the oven to peek! All that steam is doing important work in there.
After an hour, carefully take the pan out of the oven and remove the foil. The cake should look set. To be sure, stick a toothpick or a cake tester into the cake part. If it comes out clean, you’re golden. If it’s still a bit wet, cover it back up and bake for another 10-20 minutes.
Once it’s baked, lift the bundt pan out of the water bath and place it on a wire rack. Let it cool completely. This will take at least an hour. Patience is key here.
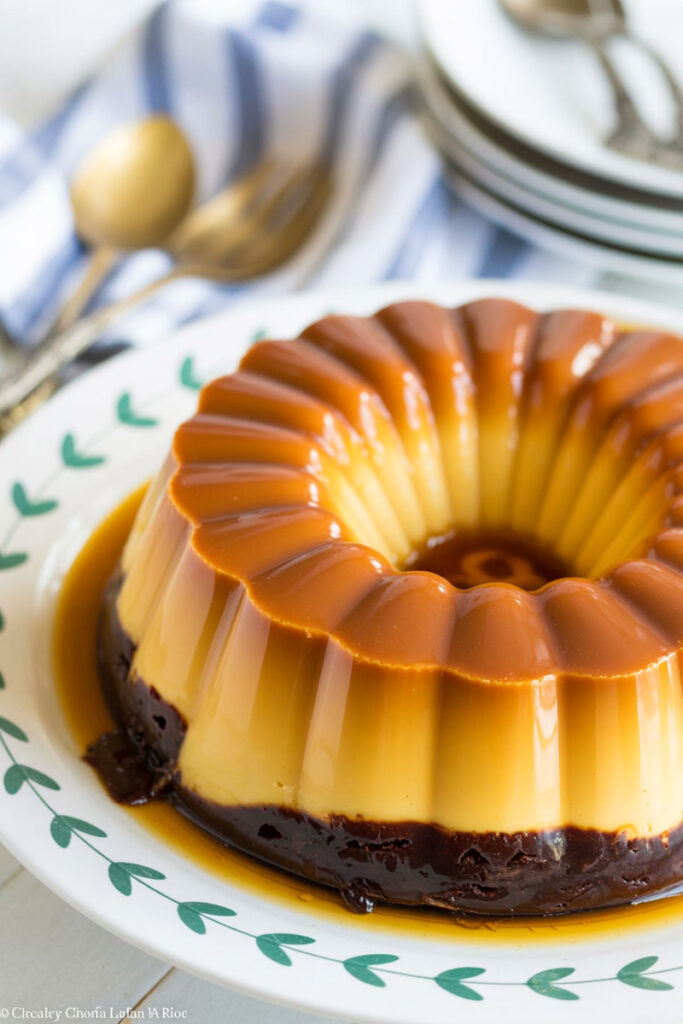
When it’s cool, you can give the pan a little shake to help loosen it. Place a big plate with a rim over the top of the pan. Take a deep breath. And in one quick, confident motion, flip it over!
Lift the pan off, and admire what you’ve made. Scrape any extra caramel left in the pan onto your beautiful Chocoflan.
Want to Mix It Up?
The classic is amazing, but here are some fun ideas:
- For coffee lovers: Add a teaspoon of instant espresso powder to the dry ingredients for the cake. Chocolate and coffee are best friends.
- For a little heat: Add a pinch (about ⅛ teaspoon) of cayenne pepper or chipotle chili powder to the cake batter for a “Mexican Hot Chocolate” vibe.
- To make it fancy: Garnish the finished cake with some toasted pecans, fresh raspberries, or chocolate shavings.
Serving and Storing Your Masterpiece
You did it! You can serve this at room temperature or chilled from the fridge. Both are amazing. It’s so rich, you don’t need anything with it… except maybe a strong cup of coffee.
To store it, cover it tightly (a cake dome is great for this) and keep it in the fridge for up to 4 days. I promise you, it’s even better on day two.
I wouldn’t freeze the whole cake. The flan can get a little watery and weird when it thaws. But you can freeze individual slices. Just wrap them tight in plastic wrap and then foil. They’ll be good for about a month.
Enjoy the magic you just created!