
Hello, friend! Let me tell you a little story. For years, my only experience with a “chalupa” was from a drive-thru window. It was fine, I guess. But then I had a real one.
It was a total revelation.
A proper homemade chalupa is something special. It’s this amazing fried bread that’s somehow pillowy-soft on the inside yet perfectly crisp and golden on the outside. It’s the perfect little boat to hold all your favorite toppings. Forget the sad, flat things you get in a paper bag. This is the real deal.
So, what are we making today? Think of it as a tribute to that fast-food classic, but made with simple, fresh ingredients from your own kitchen. We’re swapping out the preservatives for pantry staples, and the result is just… unbelievably good.
This recipe is designed to be fun and totally customizable. Let’s get into it.
So, What’s the Plan?
Before we jump in, here’s a quick look at what to expect.
Time Commitment: This won’t take all day. You’re looking at about 10 minutes to get everything ready and 20 minutes to cook. The dough needs a quick 15-minute rest, which is the perfect amount of time to chop your veggies!
How Many Does It Make? This recipe makes about 15 chalupa shells, which is great for my family. But what if you’re cooking for a party? Or just for yourself? No sweat. The dough is super easy to scale up or down.
| Servings | Flour | Baking Powder | Salt | Butter | Milk |
| 8 Shells | 1.5 cups | 2.5 tsp | 1/2 tsp | 1 tbsp | 2/3 cup |
| 15 Shells | 3 cups | 1.5 tbsp | 1 tsp | 2 tbsp | 1 ¼ cups |
| 30 Shells | 6 cups | 3 tbsp | 2 tsp | 4 tbsp | 2 ½ cups |
Difficulty: I’d call this one easy-to-medium. The dough itself is very forgiving, so it’s great for beginners. The frying part just needs a little bit of your attention to get that perfect puff and beautiful golden color. You’ll get the hang of it fast, I promise.
Stuff You’ll Need: No fancy gadgets required. You probably have all this in your kitchen right now.
- A big mixing bowl
- A rolling pin
- A heavy pan for frying (cast iron is my favorite!)
- Tongs
- A wire rack or a plate lined with paper towels
Can I Make It Ahead? Absolutely! I do this all the time to make weeknight dinners easier. You can chop the lettuce and tomatoes a day ahead. You can even make the dough, wrap it up tightly, and keep it in the fridge for up to 24 hours.
The Ingredients: Your Building Blocks to Awesome
Great food starts with simple, good ingredients. Here’s what we’re working with.
For the Amazing Chalupa Shells:
The bread is the star of the show. It’s what makes a chalupa a chalupa.
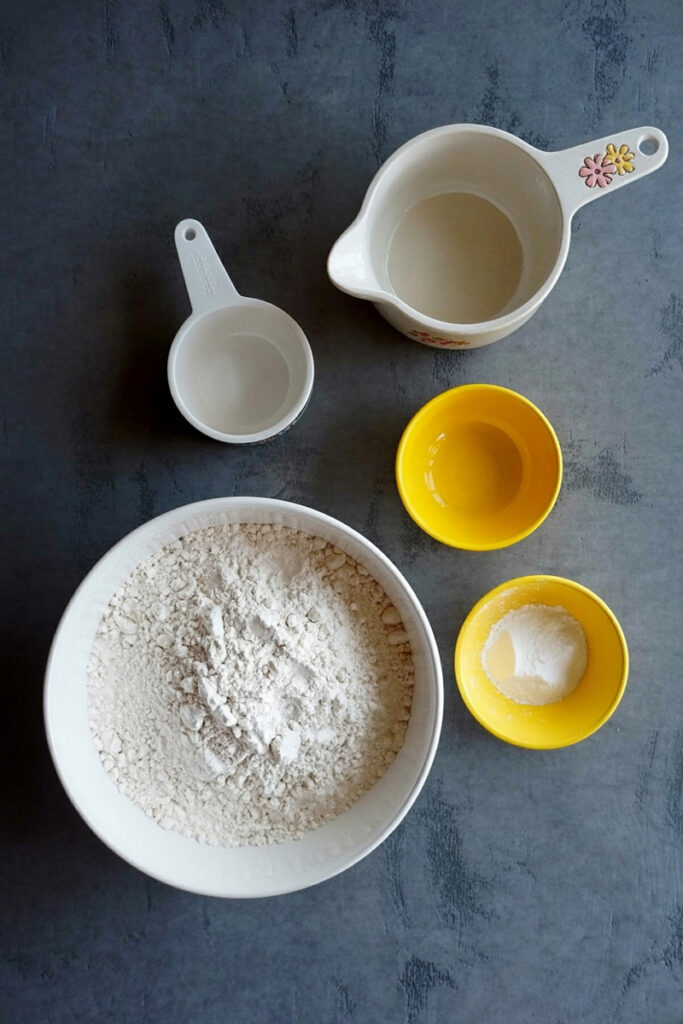
- 3 cups of all-purpose flour
- 1.5 tablespoons of baking powder (This is our secret weapon for the puff!)
- 1 teaspoon of salt
- 2 tablespoons of melted butter (I love the rich flavor this adds.)
- 1 ¼ cups of full-fat milk (Make sure it’s a little warm!)
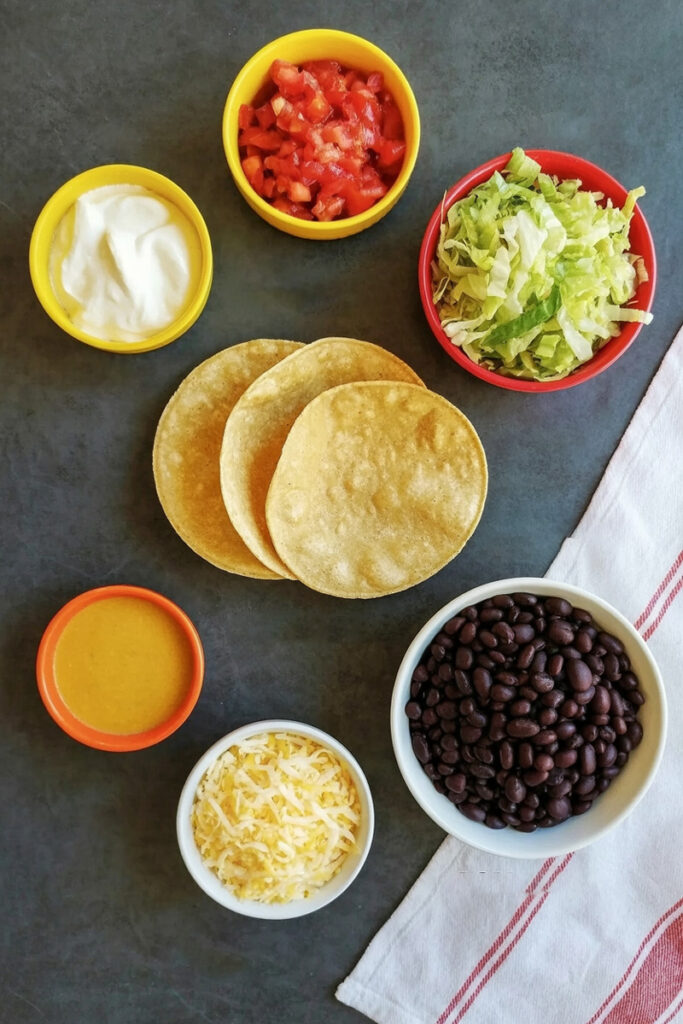
For the Toppings (The Fun Part!):
This is where you can get creative. I’m giving you a classic, veggie-friendly list, but feel free to go wild.
- 2 cups of black beans (Canned is perfectly fine, just rinse them!)
- 2 cups of chopped lettuce
- 1 cup of chopped tomatoes
- ¾ cup of sour cream
- ¾ cup of queso sauce (Store-bought is a great shortcut!)
- ¾ cup of shredded cheese (I’m using Pepper Jack for a little kick.)
The Step-by-Step Guide: Let’s Make Some Magic
Alright, roll up your sleeves. We’re about to make something delicious. I’ll walk you through every single step.
Part 1: Making That Pillowy Dough
First things first, grab your big mixing bowl. Dump in the flour, baking powder, and salt. Give it a quick whisk to mix it all together.
Now, pour in the melted butter. Use your fingers to rub the butter into the flour until it looks like coarse crumbs.
Slowly pour in the warm milk while stirring. The dough will look pretty shaggy at first. That’s okay. Just keep mixing until it comes together into a ball.
Turn the dough out onto a lightly floured countertop. Knead it for just a minute or two. You’re not trying to wrestle with it; you just want it to become soft and smooth. It should feel pliable, kind of like an earlobe.
Pop the dough back in the bowl, cover it with a kitchen towel, and let it rest for about 15 minutes. This little nap is super important. It lets the gluten relax, which makes the dough way easier to roll out.
Part 2: Frying to Golden Perfection
Okay, the dough is rested and ready. Divide it into 15 equal-sized balls.
On a floured surface, roll one ball out into a circle that’s about 5 inches wide. Don’t stress about making it a perfect circle! Mine never are.
Now for a pro tip. Take a fork and poke the dough a few times. This little step stops the chalupa from blowing up like a balloon in the oil. It helps create that perfect pocket for toppings.
Time to fry. Pour about an inch or two of oil into your pan and heat it over medium heat. You’ll know the oil is ready when it starts to shimmer. If you drop a tiny piece of dough in, it should sizzle right away.
Gently slide a dough circle into the hot oil. It should float and start puffing up almost instantly. It’s so satisfying to watch! Let it fry for about 30 seconds.
Grab your tongs. Flip the dough over. Now, gently fold it in half to make that classic taco shape. This is the key move! Hold it in that folded shape for another 30 seconds so it sets. Then you can let it go and let it fry, flipping it every so often, until it’s beautifully golden brown all over. This whole thing only takes about 2 minutes per shell.
Use your tongs to pull it out of the oil, let the extra oil drip off, and place it on your wire rack to drain. Repeat with the rest of your dough balls. Your kitchen is going to smell heavenly.
Part 3: Building Your Masterpiece
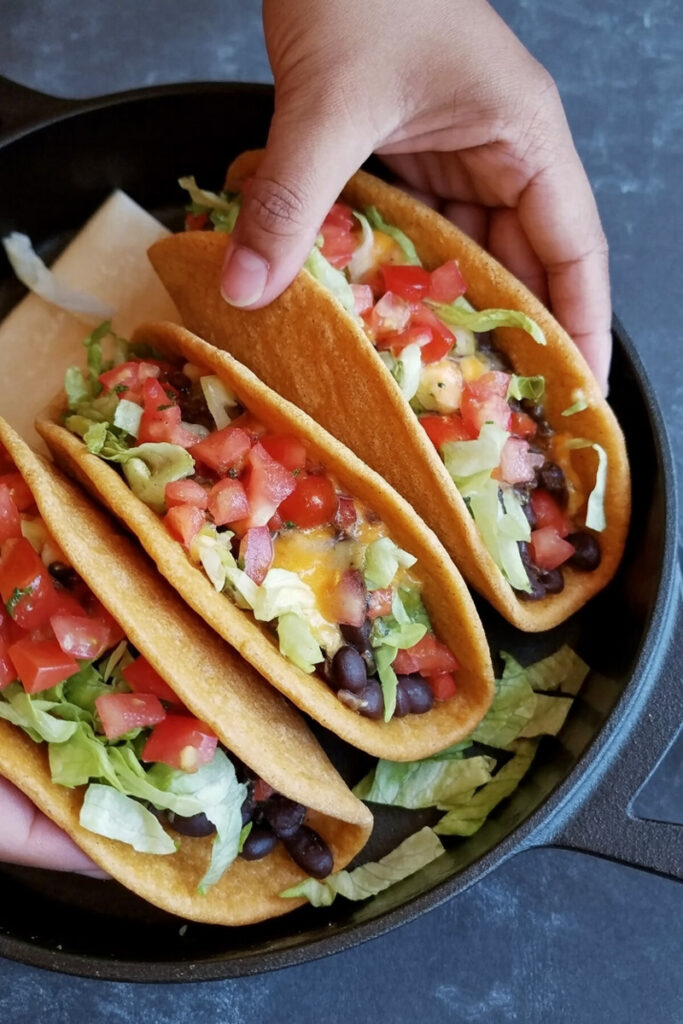
You did it! You have a pile of gorgeous, golden chalupa shells.
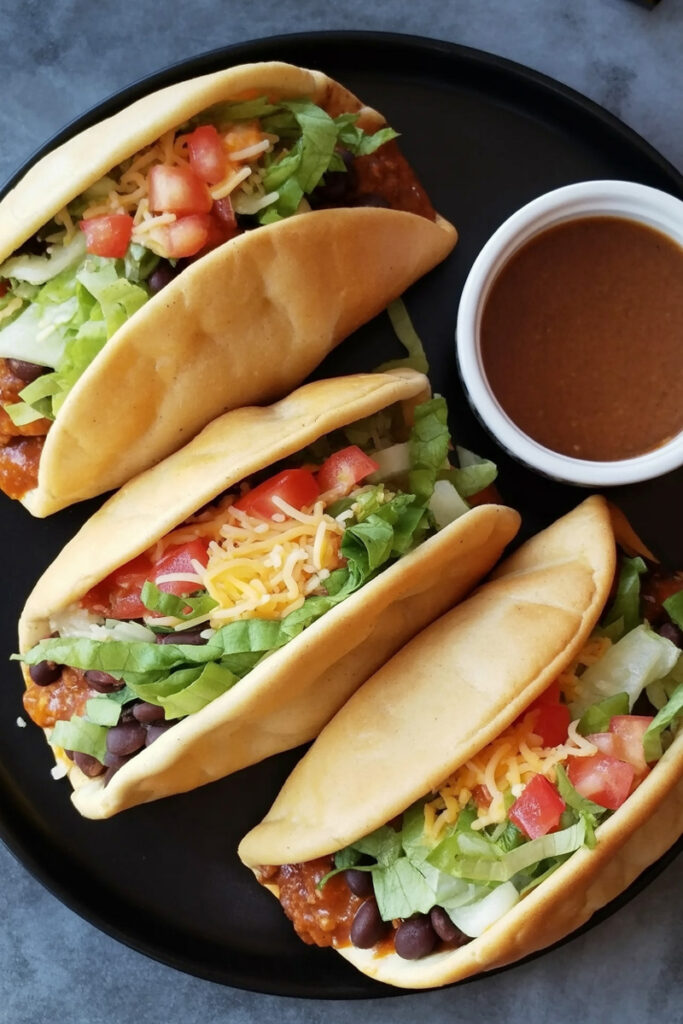
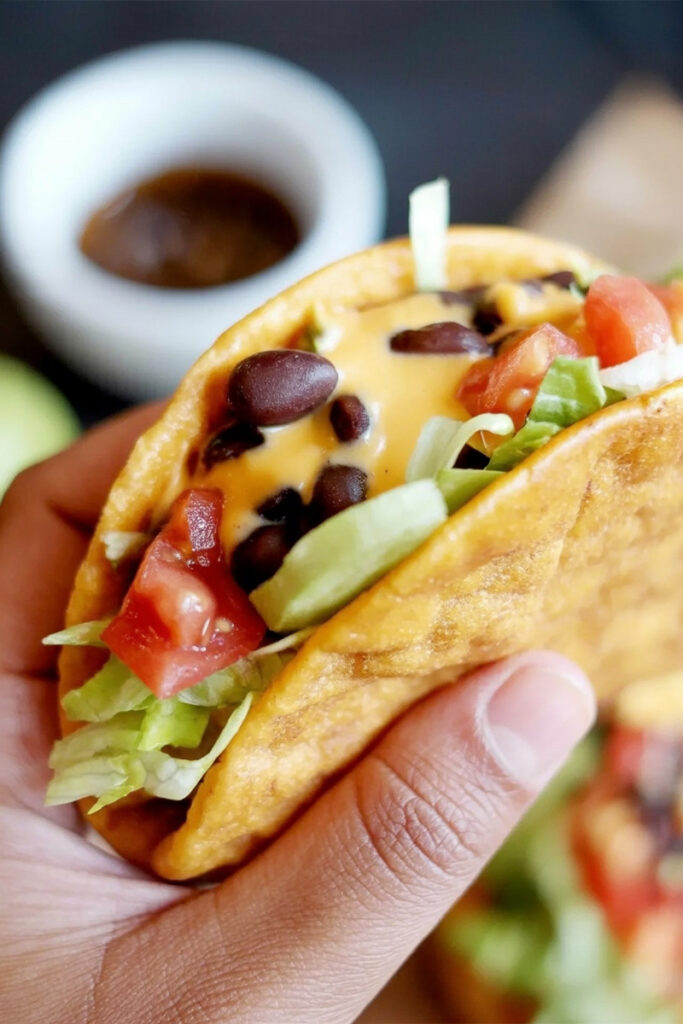
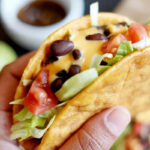
Now for the best part. Fill them up! Start with some black beans, add a dollop of sour cream, a drizzle of queso, and then pile on the lettuce, tomatoes, and cheese.
Serve them immediately, maybe with some hot sauce on the side.
Make It Your Own
The best part about this recipe is that it’s just a starting point.
- Want meat? Brown a pound of ground beef with some taco seasoning. Shredded chicken or pork carnitas are also amazing.
- Like it spicy? Add a pinch of cayenne pepper to the dough, use a spicy queso, or top with some jalapeños.
- Need a vegan option? Easy! Use vegan butter and a plant-based milk (like almond or soy) in the dough. For toppings, use vegan cheese, vegan sour cream, and lots of salsa and beans.
- Gluten-free? A good “measure-for-measure” gluten-free flour blend works really well here. Just make sure it has xanthan gum in it.
How to Serve and Store Your Chalupas
These are definitely a meal all by themselves. But if you want to make a bigger spread, they are great with a side of Mexican rice or street corn. My favorite way to serve them for a group is to set up a build-your-own chalupa bar. Put all the shells and toppings in separate bowls and let everyone go to town. It’s fun and everyone gets exactly what they want.
Chalupa shells are at their absolute best when they are fresh and warm. If you have leftovers, store the empty shells in an airtight container on the counter for a day or two.
To reheat them, pop them in an oven or air fryer at 350°F (175°C) for a few minutes until they’re crispy again. Please, whatever you do, don’t microwave them! They will just get soft and chewy. Trust me on this one.
PrintHomemade Chalupa
Forget the drive-thru! These homemade chalupas are a revelation, with a super soft, pillowy inside and a perfectly crisp, golden-brown shell. They’re surprisingly simple to make and are the perfect vessel for all your favorite taco night toppings.
- Prep Time: 15 minutes
- Cook Time: 20 minutes
- Total Time: 35 minutes
- Yield: 15 shells 1x
- Category: Dinner, Main Course
- Cuisine: Tex-Mex
Ingredients
For the Chalupa Shells:
- 3 cups all-purpose flour
- 1 ½ tbsp baking powder
- 1 tsp salt
- 2 tbsp unsalted butter, melted
- 1 ¼ cups whole milk, warmed
For Classic Toppings:
- 2 cups black beans, rinsed and drained
- 2 cups lettuce, chopped
- 1 cup tomatoes, chopped
- ¾ cup sour cream
- ¾ cup queso sauce
- ¾ cup shredded Pepper Jack or cheddar cheese
Instructions
- Make the Dough: In a large bowl, whisk together the flour, baking powder, and salt. Rub in the melted butter with your fingertips until the mixture resembles coarse crumbs. Slowly stir in the warm milk until a shaggy dough forms.
- Knead and Rest: Turn the dough onto a lightly floured surface and knead for 1-2 minutes until smooth. Place it back in the bowl, cover, and let it rest for 15 minutes. This step is crucial for a tender dough!
- Shape the Shells: Divide the dough into 15 equal balls. On a floured surface, roll each ball into a 5-inch circle. Prick each circle a few times with a fork to prevent it from puffing up completely.
- Fry to Perfection: Heat 1-2 inches of oil in a heavy-bottomed pan over medium heat until it shimmers. Gently place one dough circle in the oil. Fry for about 30 seconds until it puffs slightly.
- Fold and Finish: Using tongs, flip the dough and immediately fold it in half to create the shell shape. Hold it for 30 seconds, then release and continue frying for another 1-2 minutes, flipping as needed, until golden brown and crisp.
- Drain and Assemble: Remove the finished shell and let it drain on a wire rack or paper towel-lined plate. Repeat with the remaining dough. Once all shells are cooked, fill them with your favorite toppings and serve immediately!
Notes
- Tips & Tricks: Don’t overcrowd the pan when frying; cook shells in batches for the best results. The oil is ready when a tiny scrap of dough sizzles and floats instantly.
- Serving Suggestions: Create a “build-your-own” chalupa bar for a fun, interactive meal. These pair wonderfully with Mexican rice, elote (street corn), or a simple cilantro-lime slaw.
- Storage & Reheating: Store leftover shells in an airtight container at room temperature for up to 2 days. To bring back their crispiness, reheat in an oven or air fryer at 350°F (175°C) for 3-5 minutes. Avoid the microwave, as it will make them soft and chewy.