
Let’s be honest. All tacos are good tacos.
But then there are fried tacos. The kind with that perfect, shattering crunch. The ones where the savory, cheesy filling is sealed inside a golden shell.
They’re called tacos dorados—golden tacos—and for good reason. They are pure comfort food. Absolute bliss.
While nobody knows exactly where they came from, they’re a huge deal in Mexican and Mexican-American homes. This isn’t your drive-thru hard shell taco. This is different. This is better. The tortilla and the filling get fried together, creating this perfect, sealed little package of flavor.
The recipe I’m sharing today? It’s my all-time favorite. It’s the result of tons of family dinners and my personal quest to create the most flavorful, no-fail crispy beef taco.
What’s the secret? It’s actually simple. A killer spice blend, a little tomato paste for that deep flavor, and a surprise ingredient in the filling—sour cream! It makes the beef incredibly rich and moist.
So, go grab your apron. Let’s get frying.

A Quick Look at What’s Ahead
Before we dive in, here’s the game plan. This recipe is all about getting the best possible flavor without a ton of fuss.
Time, Servings & Difficulty
- Prep Time: 5 minutes
- Cook Time: 20 minutes
- Total Time: 25 minutes
- Servings: 4 (makes 12 tacos)
- Difficulty: Easy to Medium. The steps are simple, but you do need to pay attention when frying. It’s a great recipe if you’re looking to get more comfortable with it!
Need to feed an army? Or just yourself? This recipe is super easy to scale up or down.
| Servings | Ground Beef | Seasonings (Total) | Tortillas |
| 2 (6 Tacos) | 250g / 9oz | ~2 tsp | 6 |
| 4 (12 Tacos) | 500g / 17oz | ~4 tsp | 12 |
| 8 (24 Tacos) | 1kg / 35oz | ~8 tsp | 24 |
The Tools for the Job
Don’t worry, you don’t need a professional kitchen. You probably have everything you need right now.
- A Large Skillet or Frying Pan: A heavy-bottomed one, like a cast iron pan, is your best bet. It holds heat really well, which means crispier tacos.
- Frying Thermometer: This is optional, but it’s the best way to make sure your oil is at the perfect temperature. No more greasy tacos.
- Tongs: Trust me, these will be your best friend for getting the tacos in and out of the hot oil safely.
- The Basics: You’ll also need a cheese grater and a chopping board.
What if I don’t have everything? No problem!
- No Frying Thermometer? No sweat. Just use the old bread trick. Drop a small cube of bread into the oil. If it turns golden brown in about 30-45 seconds, you’re good to go.
- No Tongs? You can use a sturdy slotted spoon or a fish spatula. Just be extra careful!

Want to Prep Ahead? Easy.
One of my favorite things about this recipe is how easy it is to prep. This is a game-changer for parties.
- The Filling: You can cook the beef filling completely, let it cool, and then pop it in an airtight container in the fridge. It’ll be good for up to 3 days.
- Pre-Assembly: This is my go-to move. You can actually fill the tortillas with the beef and cheese, fold them, and lay them out on a baking sheet. Cover them tightly and keep them in the fridge for a few hours until you’re ready to fry.
What You’ll Need (And Why It Works)
Good food always starts with good ingredients. Here’s a rundown of our lineup.
At the heart of it all is the savory beef filling. We’re using 500g (17 oz) of ground beef. I really recommend an 80/20 blend. That bit of fat adds a ton of flavor and keeps the filling from drying out.
The spice blend is where the magic happens. We’ve got paprika for smokiness, cayenne pepper for a little kick, and cumin for that classic taco vibe. My secret weapon? A teaspoon of Worcestershire sauce. It adds this deep, savory flavor that you can’t quite identify, but you’d definitely miss it if it wasn’t there. We’ll also use tomato paste to bring it all together.
Now for the creamy, cheesy part. A couple of tablespoons of sour cream stirred in at the end changes everything. It adds a little tang and makes the filling unbelievably creamy. And of course, cheese. You’ll need about one cup of shredded cheese. You can buy pre-shredded, but if you grate your own block of sharp cheddar or Monterey Jack, the melt is just glorious.
The taco itself? You’ll need 12 corn tortillas. Corn is key here. It gives you that authentic flavor and fries up perfectly. Finally, you’ll need a neutral oil for frying—canola, vegetable, or sunflower oil all work great.
Let’s Get Cooking: The Step-by-Step
Alright, apron on? Let’s head to the stove. We’re doing this in three simple stages: making the filling, building the tacos, and frying them up.
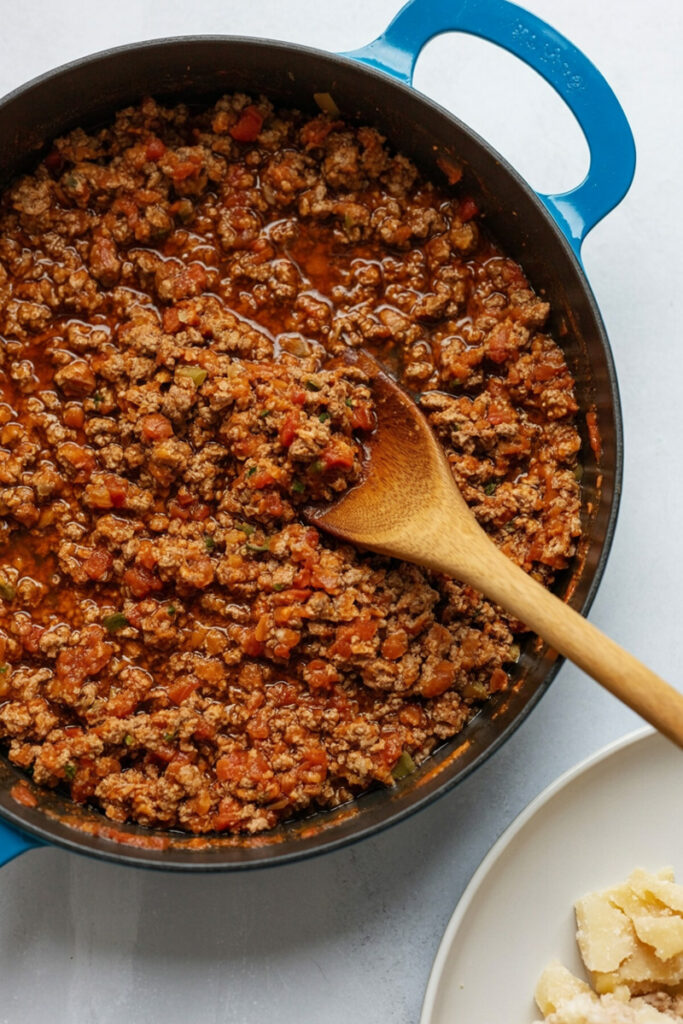
Step 1: Build That Flavorful Beef Filling
First, get your large skillet over medium-high heat and add a little oil. When it shimmers, add the ground beef. You should hear a nice sizzle.
Break the beef up with a spoon and let it cook until it just starts to brown.
Now for the flavor. Add your paprika, cayenne pepper, cumin, salt, and Worcestershire sauce. Stir it all together. Take a second to just smell that. Amazing, right?
Next, stir in the tomato paste. This is a crucial move. Let it cook for 2-3 minutes, mixing it into the beef. The paste will get a little darker. This little step deepens the whole flavor of the dish.
Finally, kill the heat and stir in the sour cream. Watch it melt into the beef, making the filling super rich and creamy. Set that aside for a minute.
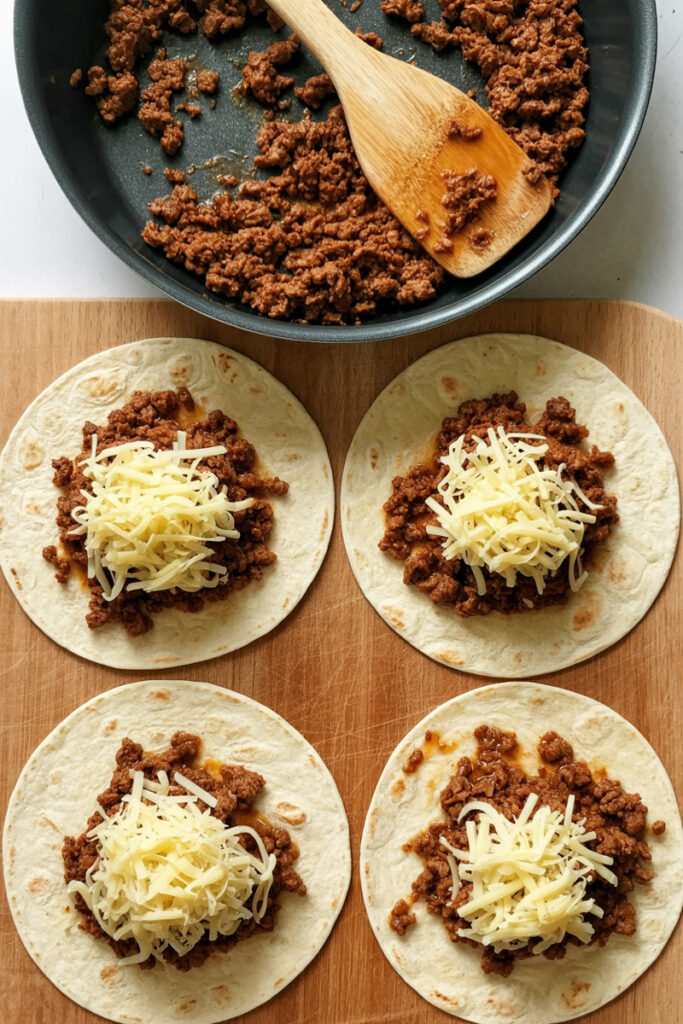
Step 2: Assemble Your Tacos
Time to bring these little flavor packets to life.
Here is the most important tip I can give you: warm your tortillas! This makes them soft and easy to fold without cracking. Just heat them for a few seconds on each side in a dry pan, or wrap the stack in a damp paper towel and microwave them for 30-40 seconds.
Lay a warm tortilla flat. Spoon some of the beef filling onto one half. Be careful not to overfill them, or they can burst open while frying.
Sprinkle a little shredded cheese on top of the meat. Gently fold the other half of the tortilla over.
If you’re new to this, I suggest the toothpick trick. Just poke a toothpick through the open side to hold it shut. It makes frying completely worry-free. Repeat until you have 12 tacos ready to go.
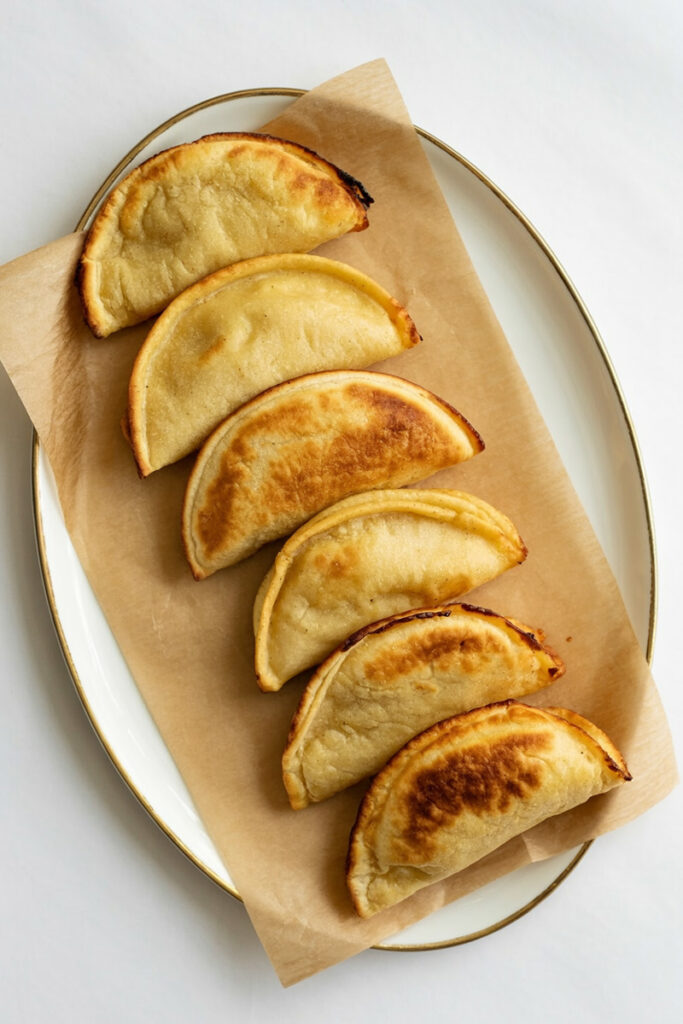
Step 3: The Golden Fry
Time for the main event. This is the fun part.
Pour about ½ inch of oil into your skillet and heat it over medium-high heat. If you’re using a thermometer, you want it to be around 350-375°F (175-190°C).
Using your tongs, carefully place 3 or 4 tacos in the hot oil. Give them some space! If you overcrowd the pan, the oil temperature will drop, and you’ll end up with greasy tacos. Nobody wants that.
Let them fry for 2-3 minutes on the first side. You’ll see the edges turn a beautiful golden brown.
Gently flip them over and fry for another 2-3 minutes.
Once they’re golden and crispy all over, use your tongs to lift them out. Let the extra oil drip off, then place them on a plate lined with paper towels. If you used toothpicks, now’s the time to pull them out.
Serve them right away while they’re hot and crispy!
Don’t Be Afraid to Mix It Up!
Think of this recipe as a starting point. Here are a few ideas to make it your own:
- Dietary Swaps: For a great vegan version, use a plant-based crumble instead of beef, along with vegan sour cream and cheese. Since we’re using corn tortillas, the recipe is already gluten-free!
- Adjust the Heat: Love spicy food? Add a finely chopped jalapeño to the beef or just add more cayenne. If you prefer things mild, you can skip the cayenne completely.
- Protein Swaps: This method is awesome with other fillings too! Try shredded chicken made with the same spices, or even a mix of black beans and corn for a vegetarian twist.

Time to Eat! (And How to Store Leftovers)
This is the best part. Serving them up and digging in.
Plating and Perfect Sides
I like to put all the tacos on a big platter and serve them family-style. Set out some small bowls with toppings so everyone can build their own perfect taco.
Some ideas:
- Shredded lettuce
- Extra sour cream
- Fresh guacamole
- Cilantro
- Pickled jalapeños
As for sides, you can’t go wrong with cilantro-lime rice, refried beans, or a fresh corn salad.
Got Leftovers? Here’s the Plan.
Storage: If you happen to have any left, let them cool down completely. Then store them in an airtight container in the fridge for up to 3 days.
Reheating: Okay, listen up. Do not use the microwave. Seriously. It’s the enemy of all things crispy. To bring them back to life, place the tacos on a baking sheet in a 375°F (190°C) oven or in an air fryer for about 5-7 minutes. They’ll be hot and crispy all over again.
Freezing: You can also freeze the uncooked, assembled tacos. Just place them on a baking sheet in a single layer and freeze until they’re solid. Then, you can toss them into a freezer-safe bag. You can fry them right from the freezer—just add a couple of extra minutes to the cooking time.